 The Journey of a Tissue Sample: From Biopsy to Diagnosis
Every accurate diagnosis begins with a tiny tissue sample. Behind every pathology report lies a carefully coordinated workflow involving advanced laboratory equipment, skilled professionals, and precise processes that transform a biopsy specimen into valuable diagnostic information.
Histopathology plays a critical role in modern healthcare by helping clinicians diagnose diseases, monitor treatment effectiveness, and guide patient management. From cancer diagnosis to inflammatory disorders and infectious diseases, tissue examination remains one of the most reliable diagnostic tools available today.
Let's explore the fascinating journey a tissue sample takes inside a Histopathology laboratory before reaching the pathologist's final diagnosis.
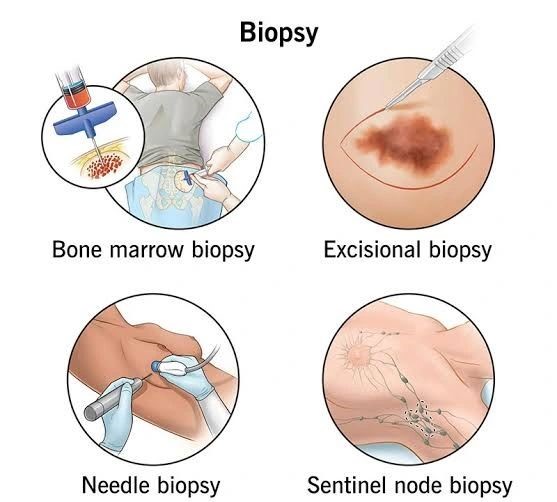
🔹 1. Tissue Collection (Biopsy)
The journey begins when a physician collects a tissue specimen through a biopsy or surgical procedure. To preserve cellular structures and prevent tissue degradation, the specimen is immediately placed in a fixative solution, typically neutral buffered formalin.
🔹 2. Gross Examination
Once received in the laboratory, the specimen undergoes gross examination. During this stage, a pathologist or trained histotechnologist carefully inspects, measures, weighs, and documents the tissue before selecting representative sections for further processing.
🔹 3. Tissue Processing
The selected tissue sections are loaded into a Tissue Processor where they undergo dehydration, clearing, and paraffin infiltration. This critical step removes water from the tissue while preserving microscopic details required for diagnosis.
🔹 4. Embedding
After processing, tissues are embedded in paraffin wax blocks. Embedding provides structural support, ensuring that ultra-thin sections can be cut accurately during microtomy.
🔹 5. Sectioning with a Microtome
Using a precision Microtome, tissue sections approximately 3–5 microns thick are cut from the paraffin block. These extremely thin sections are necessary to allow light to pass through the tissue during microscopic examination.
🔹 6. Floatation & Drying
The delicate tissue ribbons are carefully stretched on a Tissue Floatation Bath to remove wrinkles before being transferred onto microscope slides. The slides are then dried and prepared for staining.
🔹 7. Staining
Tissue sections are stained to enhance contrast and reveal cellular structures. The most commonly used stain is Hematoxylin & Eosin (H&E), which helps pathologists visualize nuclei, cytoplasm, and tissue architecture in great detail.
🔹 8. Microscopic Examination
The stained slides are examined under a microscope by a pathologist. During this stage, tissue architecture, cellular morphology, inflammation, infections, benign lesions, and malignancies are carefully evaluated.
🔹 9. Final Diagnosis
Based on microscopic findings and clinical information, the pathologist prepares a detailed pathology report. This report provides clinicians with critical diagnostic information that guides treatment planning and patient care decisions.
🎯 Precision at Every Step
From a tiny tissue specimen to a life-changing diagnosis, every stage of the histopathology workflow requires precision, expertise, and reliable laboratory equipment. Each process contributes to delivering accurate and timely diagnostic information that directly impacts patient outcomes.
Supporting Modern Histopathology Laboratories
At ISTOS Medical, we support pathology laboratories with advanced Histopathology solutions including Tissue Processors, Embedding Systems, Microtomes, Cryostats, Grossing Stations, Tissue Floatation Baths, Slide Stainers, Coverslippers, and laboratory consumables.
![]() www.istosmedical.com
www.istosmedical.com