🔧 The Complete Guide to Rotary Microtome Maintenance, Preventive Servicing & Repair
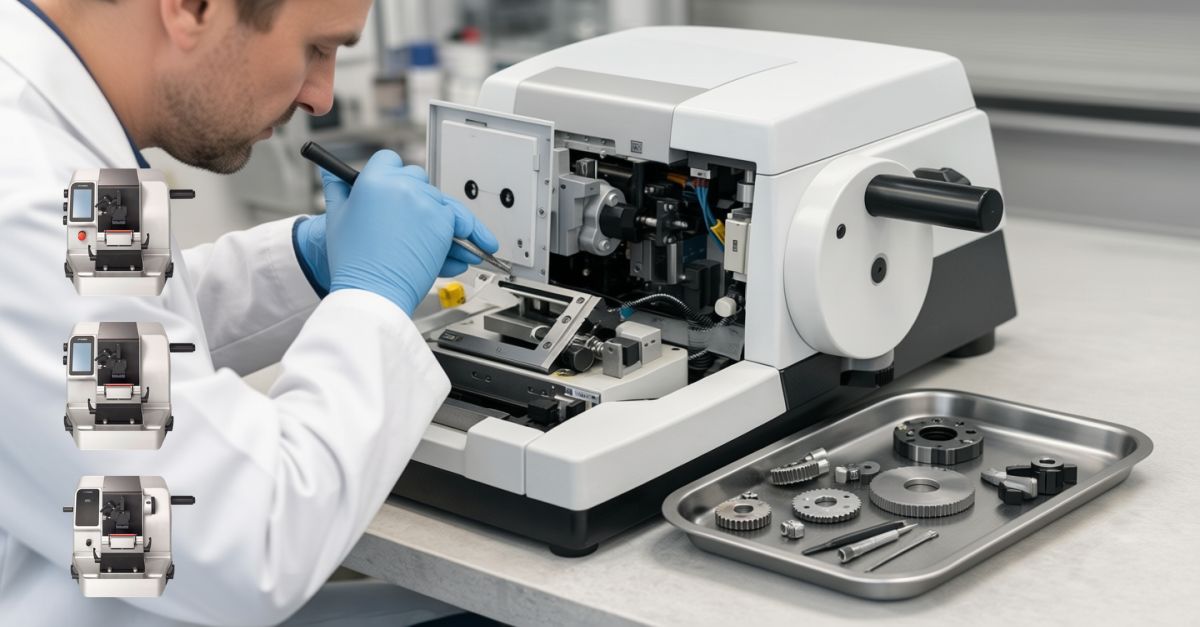
A Step-by-Step Technical Handbook for Histopathology Laboratories 🔬
A rotary microtome is one of the most critical instruments in the histopathology laboratory. Consistent section quality, technician safety and long-term reliability all depend on correct operation, preventive maintenance and professional servicing.
This guide is designed as a practical, technical resource for histotechnologists, biomedical engineers, service technicians and lab managers who are responsible for keeping rotary microtomes safe, accurate and available for daily diagnostic work.
📚 Scope of This Guide
This handbook provides a structured, equipment-centric view of rotary microtome care. It can be used as a training document, maintenance checklist and reference for service planning.
Key Topics Covered ✅
- 🧩 What is a Rotary Microtome?
- 🧱 Anatomy of a Rotary Microtome (every component explained)
- ⚙️ Working Principle
- 📆 Daily, Weekly, Monthly & Annual Preventive Maintenance
- 🔩 Disassembly & Reassembly Framework
- 🛢️ Lubrication Guide
- 📐 Alignment & Calibration Highlights
- 🧰 Common Problems & Troubleshooting
- 📦 Spare Parts & Service Strategy
- 📄 AMC vs CMC Overview
- 🧪 PFM 3004 M, PFM 3005 E & PFM 3006 EM Overview
Who Should Use This Guide 👩🔬🧑🔧
Designed for:
- Histotechnologists and senior technicians responsible for daily microtome operation.
- Biomedical engineers and service technicians planning preventive maintenance and repairs.
- Pathology lab managers setting standards for uptime, safety and section quality.
🧩 What is a Rotary Microtome?
A rotary microtome is a precision instrument used to cut reproducible, ultra-thin sections of paraffin-embedded tissue (typically 1–20 µm) for microscopic examination in histopathology.
- Converts controlled rotary motion into linear cutting movement.
- Ensures uniform section thickness for reliable diagnostic evaluation.
- Supports high-throughput, routine and specialised applications in histopathology.
🧱 Anatomy of a Rotary Microtome
The main components of a rotary microtome can be grouped into mechanical, specimen-holding, cutting and control systems. Understanding each part is essential for accurate maintenance and troubleshooting.
| Component 🔩 | Function 🔍 | Maintenance Focus 🛠️ |
|---|---|---|
| Base & frame | Provides structural stability and vibration control. | Clean surfaces, check levelling, inspect mounting points. |
| Handwheel | Controls rotary movement and cutting stroke. | Check free rotation, safety lock, braking action. |
| Specimen clamp / holder | Secures the tissue block during sectioning. | Clean jaws, inspect clamping force, tighten fasteners. |
| Blade holder / knife carriage | Holds disposable blade or knife at defined angle. | Remove resin build-up, check angle settings, tighten screws. |
| Feed mechanism | Advances specimen in controlled steps toward the blade. | Lubricate sliding surfaces, verify step accuracy. |
| Section thickness adjustment | Sets the desired cutting thickness in microns. | Test calibration, verify repeatability. |
| Safety lock / brake | Prevents accidental movement during loading or cleaning. | Verify engagement, test emergency stop function. |
| Electronic control system (E / EM models) | Automates movement, counts sections, monitors parameters. | Check sensors, encoder signals, display and error logs. |
⚙️ Working Principle (High-Level)
At a high level, the rotary microtome converts controlled rotary motion into linear cutting movement while advancing the specimen in precise steps.
- The handwheel or motor drives a cam mechanism that converts rotary motion into linear movement.
- The feed mechanism advances the specimen toward the blade by preset steps.
- Each stroke cuts a section of defined thickness, which is transferred to the water bath and slide.
📆 Preventive Maintenance Overview
Preventive maintenance should follow a structured schedule to minimise downtime and extend instrument life. Daily operator care complements monthly and annual engineer servicing.
| Frequency | Typical Tasks | Responsibility |
|---|---|---|
| Daily | Surface cleaning, debris removal, visual safety checks. | Operator / histotechnologist. |
| Weekly | Detailed cleaning of clamp and blade holder, check screws. | Operator with supervisor. |
| Monthly | Lubrication of moving parts, inspection of feed and locks. | Biomedical engineer / service team. |
| Annual | Full inspection, calibration, wear-parts replacement. | Authorised service engineer / OEM partner. |
✅ Daily Operator Checklist
- Clean paraffin and debris from the specimen clamp and blade holder.
- Verify that the handwheel safety lock engages correctly.
- Check that the section thickness setting matches protocol requirements.
- Inspect blades for nicks, corrosion or uneven cutting performance.
- Confirm the instrument is level and vibration-free during use.
✅ Weekly Operator / Lab Supervisor Checklist
- Remove the blade holder and clean undercarriage surfaces.
- Inspect specimen clamps for wear, misalignment or loosening.
- Check handwheel play and listen for unusual sounds during operation.
- Verify safety labels, guards and covers are intact.
- Record any minor issues in the maintenance log.
🧑🔧 Monthly & Annual Engineer Checklist
- Inspect feed mechanism for backlash and uniform advancement.
- Check and lubricate guide rails, bearings and sliding components.
- Test section thickness calibration using reference blocks.
- Verify encoder and sensor outputs (for E / EM models).
- Inspect motor couplings, belts or gears for wear.
- Check all electrical connections, fuses and PCB mounting points.
- Update maintenance and service records, including replaced parts.
🔩 Disassembly & Reassembly (High-Level Framework)
Detailed disassembly and reassembly should follow OEM service manuals. The framework below provides a structured view of typical engineer workflows.
| Step | Disassembly Action | Reassembly Focus |
|---|---|---|
| 1 | Remove blade and blade holder, store safely. | Confirm correct knife angle and secure tightening. |
| 2 | Detach specimen clamp assembly. | Check clamp alignment and block orientation. |
| 3 | Access feed mechanism covers and guards. | Verify smooth feed movement without binding. |
| 4 | Open side / rear panels to access internal mechanics. | Secure all fasteners, cable routing and lubrication points. |
| 5 | For E / EM models, access motor, encoder and PCB compartments. | Confirm wiring integrity and correct connector seating. |
🛢️ Lubrication Guide
Lubrication is critical for smooth motion and prolonging component life. Over-lubrication or incorrect products can cause contamination and binding.
- Use OEM-recommended lubricants only (grease or oil types specified in the service manual).
- Apply sparingly to guide rails, spindle threads and bearing points.
- Avoid contaminating the blade holder, specimen area or external surfaces with lubricant.
- Record lubrication points and dates in the instrument logbook.
📏 Alignment & Calibration Highlights
Accurate alignment and calibration underpin section quality and reproducibility. These checks should be part of annual servicing and any major repair.
- Check parallelism between blade edge and specimen block surface.
- Verify the specimen clamp face is square to the cutting plane.
- Use calibration blocks or gauge slides to test section thickness accuracy.
- For E / EM models, confirm digital thickness settings match actual measurements.
🧰 Common Problems & Troubleshooting (Sample)
The full guide can expand this section into 30+ specific problems, symptoms and corrective actions. The table below shows a sample structure.
| Symptom | Likely Cause | Suggested Action |
|---|---|---|
| Chatter or vibration in sections | Loose clamp, dull blade or unstable base. | Tighten clamp, replace blade, check levelling and stability. |
| Incomplete sections or tears | Improper cutting angle or feed step. | Adjust knife angle, verify thickness setting and tissue processing. |
| Handwheel feels heavy or rough | Insufficient lubrication or mechanical binding. | Inspect internal guides, clean and lubricate; check for foreign material. |
| Section thickness inconsistent (E / EM) | Encoder misread or sensor contamination. | Clean sensor, verify encoder function and recalibrate section thickness. |
📦 Spare Parts & Service Strategy
Planning spare parts and service strategy in advance reduces downtime and helps laboratories maintain predictable budgets.
- Maintain a minimum stock of blades, clamps, common fasteners and wear components.
- Plan annual replacement of high-wear parts based on usage and environment.
- Document part numbers, suppliers and compatibility with each microtome model.
- Align AMC / CMC coverage with expected workloads and uptime requirements.
🤝 AMC vs CMC (Overview)
| Aspect | AMC (Annual Maintenance Contract) | CMC (Comprehensive Maintenance Contract) |
|---|---|---|
| Coverage | Labour and scheduled preventive maintenance. | Labour, preventive maintenance and major parts. |
| Cost predictability | Lower annual fee, variable repair costs. | Higher annual fee, stable repair cost budgeting. |
| Ideal use case | Lower-load labs with limited usage. | High-throughput labs needing guaranteed uptime. |
🏥 Why Laboratories Trust ISTOS Medical
ISTOS Medical focuses specifically on histopathology infrastructure and equipment, combining engineering rigour with practical laboratory experience.
- Specialised focus on histopathology workflows and equipment design.
- Engineer-led solutions balancing precision, ergonomics and safety.
- Strong training, documentation and knowledge-centre support for teams.
- PFM series rotary microtomes tailored for diverse lab workloads.
🧪 PFM 3004 M, PFM 3005 E & PFM 3006 EM (Overview)
ISTOS Medical offers a range of rotary microtomes designed for different workload profiles and automation requirements in histopathology laboratories.
| Model | Type | Typical Use Case |
|---|---|---|
| PFM 3004 M | Manual rotary microtome. | Routine histopathology labs with controlled workloads and strong technician skill. |
| PFM 3005 E | Semi-automatic rotary microtome. | Labs balancing automation with manual control for flexibility and training needs. |
| PFM 3006 EM | Fully automatic rotary microtome. | High-throughput, standardised sectioning environments requiring maximum reproducibility. |
For full OEM procedures, torque specifications, wiring diagrams and model-specific steps, always refer to official ISTOS Medical service manuals and training programmes.